Sprouting
…grow some friends!
Adding sprouting into your routine may be the best thing you’ve ever done. For the little time and effort it takes to start a batch of sprouts or microgreens, the health benefits are so tremendous you’ll find yourself “addicted” to the process. Not convinced just yet? Learn why so many people have become lifelong sprouters.
Benefits of sprouting:
Vitamins
- Vitamin content increases in the sprouting process, particularly the vitamins A, C, E and the B vitamins.
- Measurements taken from seeds (i.e. beans, nuts, seeds and grains) before and after sprouting them have demonstrated increases in up to 20 times the original vitamin content.
- It has also been demonstrated that consuming young sprouts ensures a higher vitamin dose per bite than you would receive from the full grown plant.
Minerals
- Many minerals that were already present in the original seed will bind to protein during sprouting.
- By binding to protein, these minerals become easier to absorb and utilize in the body.
Enzymes
- It is estimated that sprouts have 100 times more enzymes in them than the fully grown uncooked vegetable or fruit.
- Enzymes are responsible for assisting and speeding up vital reactions in our bodies. They are essential in the digestive process as they help break down different molecules in our food to be absorbed.
- Eating sprouts thus helps us absorb more nutrients from our food.
Fibre
- Fibre content increases substantially in beans, nuts, seeds and grains when they are sprouted.
- Fibre is responsible for maintaining a proper digestive flow and improves elimination.
Energy Powerhouse
- Once you initiate the process of plant growth by germinating the seed, you activate an enormous amount of energy.
- All the energy that is required to grow a large complex plant is contained within the sprout. We are able to harness that energy for our body processes when we consume the sprouts.
- Not to mention the energy we save during digestion (because of the enzyme activity) it’s no wonder sprouts make us feel so energized.
Cancer Fighting
- The cancer-fighting compound, sulforaphane is found in cruciferous vegetables, including kale, cabbage, cauliflower and especially broccoli.
- By sprouting broccoli, the sulforaphane content increases by 10-100 times (one ounce of broccoli sprouts contains as much sulforaphane as 1½ lbs of broccoli).
- Sprouts are very alkalizing to the body, making it difficult to impossible for cancer cells to survive and accumulate. Immunity also improves in a more alkaline environment.
Pesticide Free
- By sprouting seeds yourself, you know that they are free of pesticides, unwanted food additives and other toxins.
Economical
- Many people say they cannot afford healthy foods because they are more expensive than junk food.
- Sprouts are inexpensive, with a total cost of $0.50 – $1.00 to grow 1 week’s worth of sprouts. Great for you and your wallet!
It’s Fun!
- Sprouting does not require much effort; just add water and witness nature’s intelligent process of transforming tiny seed into a complex organism never ceases to amaze me.
- Starting these foods from their seeds and watching them grow day by day is pretty darn cool!
Sprouting Basics
Seed Storage
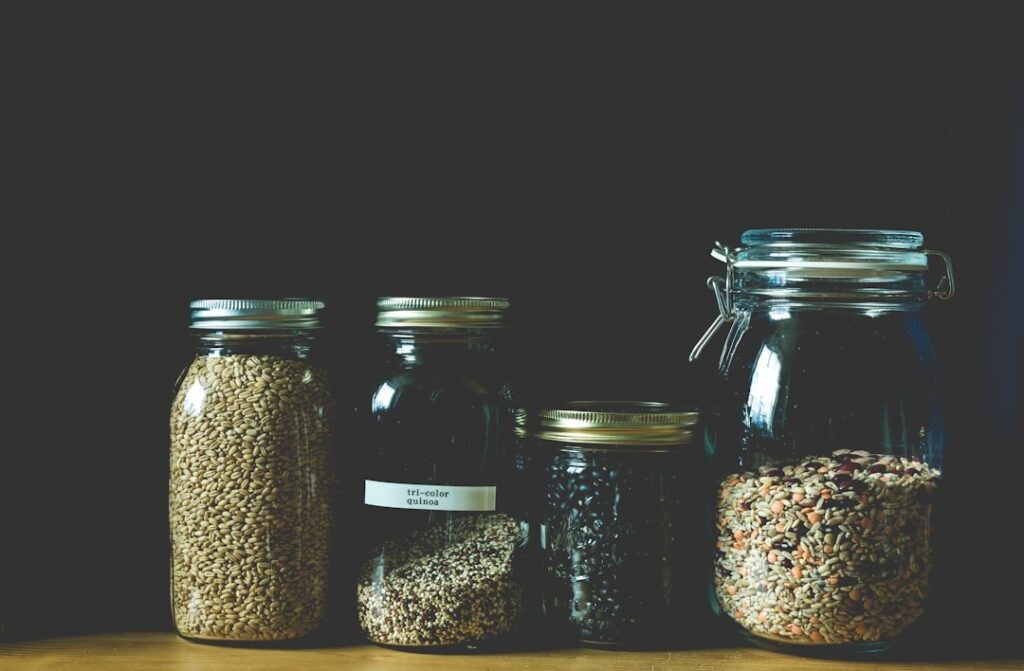
Seeds are able to stay dormant and can last for centuries. They can also last only a few weeks if they are stored improperly.
Here’s how you can make yours last:
The best storage for your seeds is in a cool (55-70°F), dry, dark place with a humidity of 70% or less. Most seed and bean sprouts that we buy currently have a shelf life of five years and this storage environment will help them last this long.
Seed life can also be increased by freezing them (which increases their life 4-5 times) or refrigerating them (which can double their shelf life). Just be sure to avoid condensation in these cases as it will shorten the seed’s life.
Preparing and Soaking
The seeds are dormant while they are dry. Soaking the seeds will activate enzymes to end their dormancy and begin their process of sprouting to grow plants.
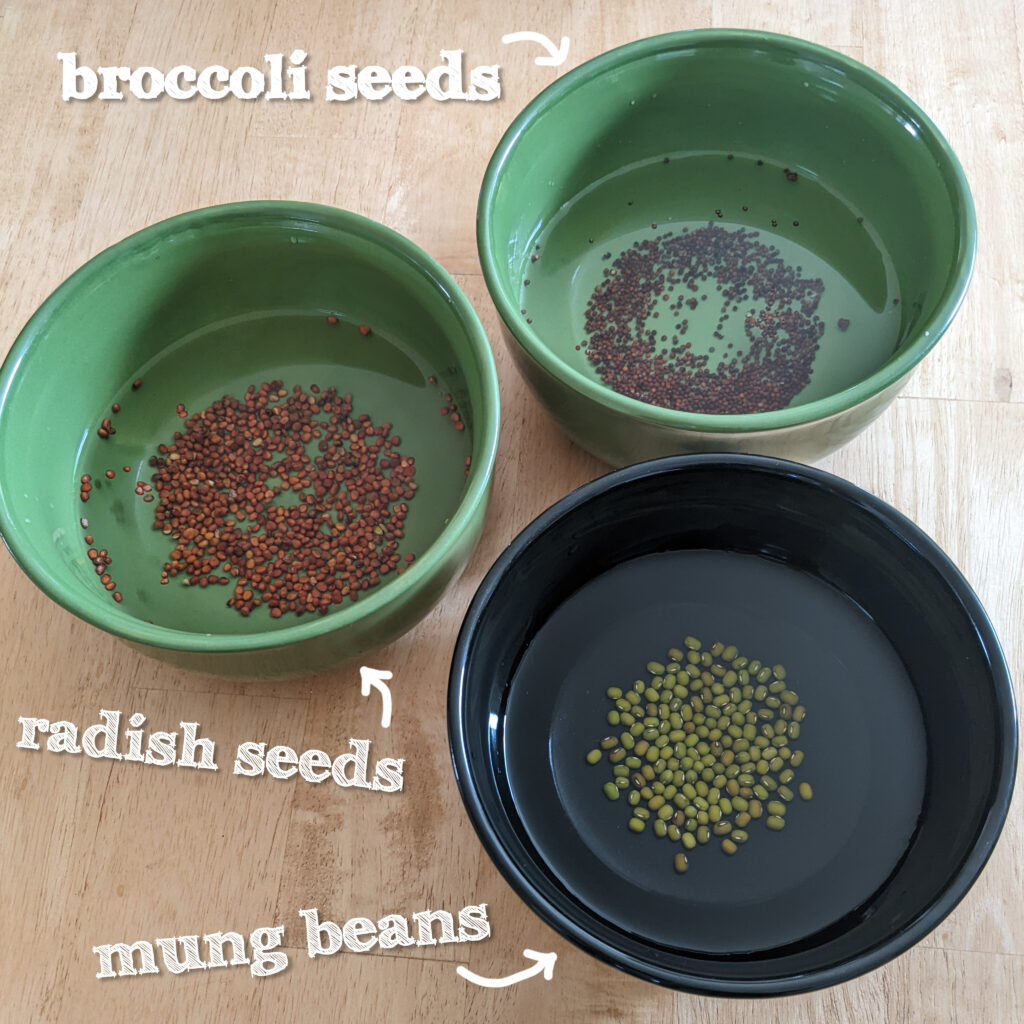
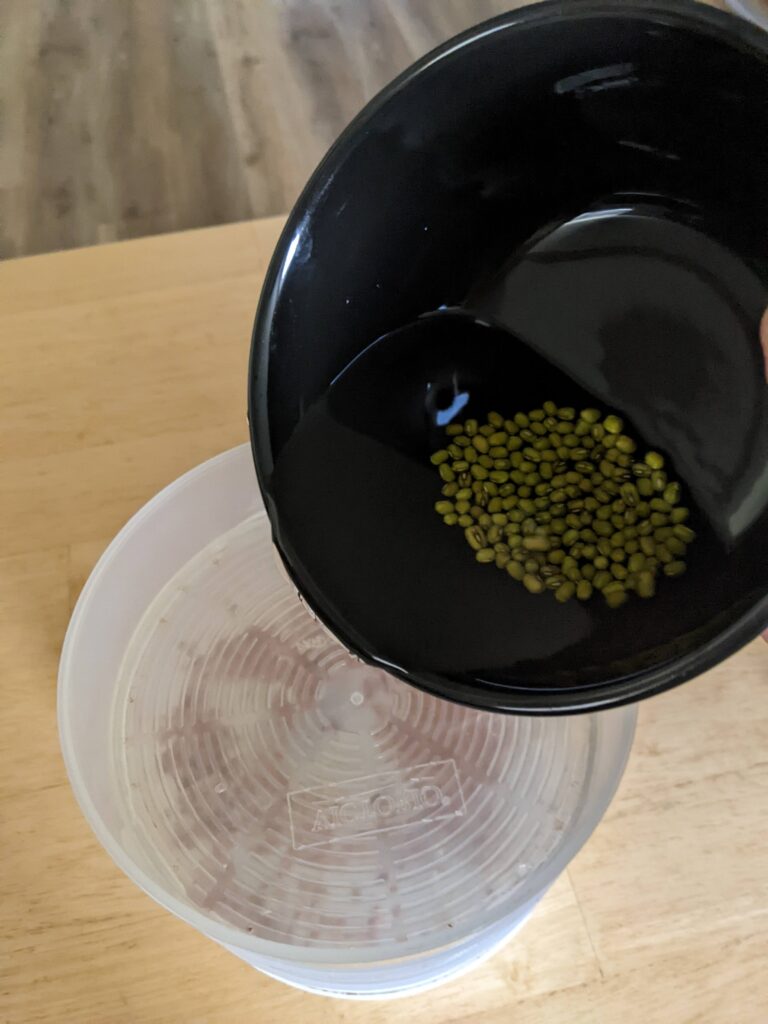
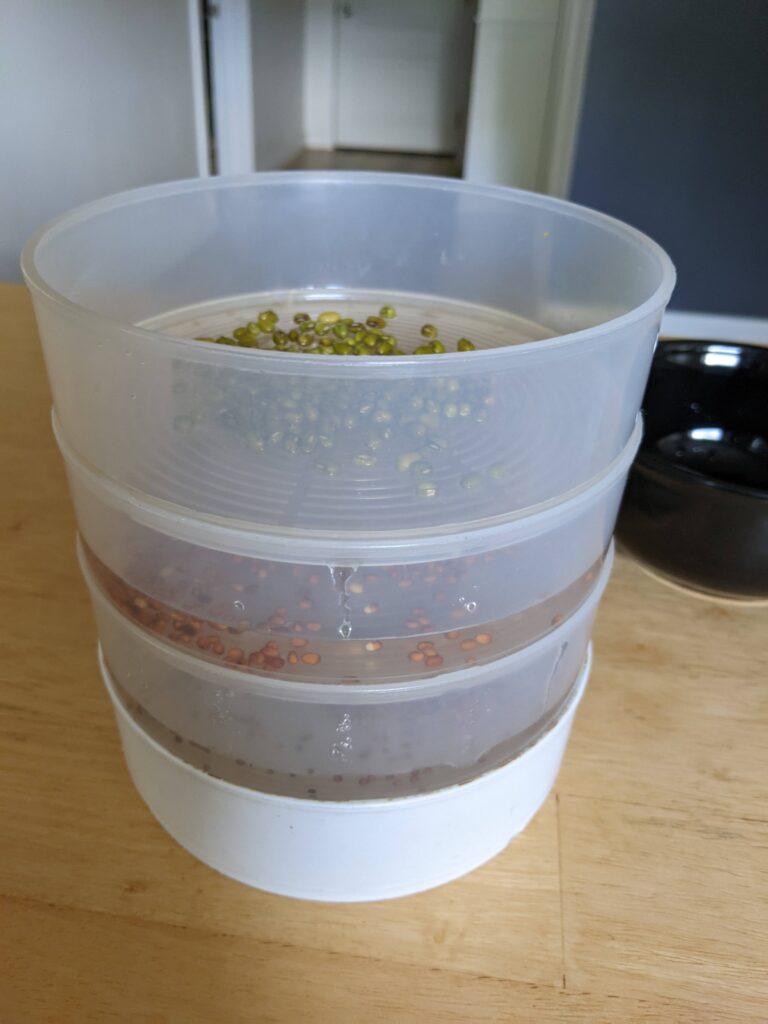
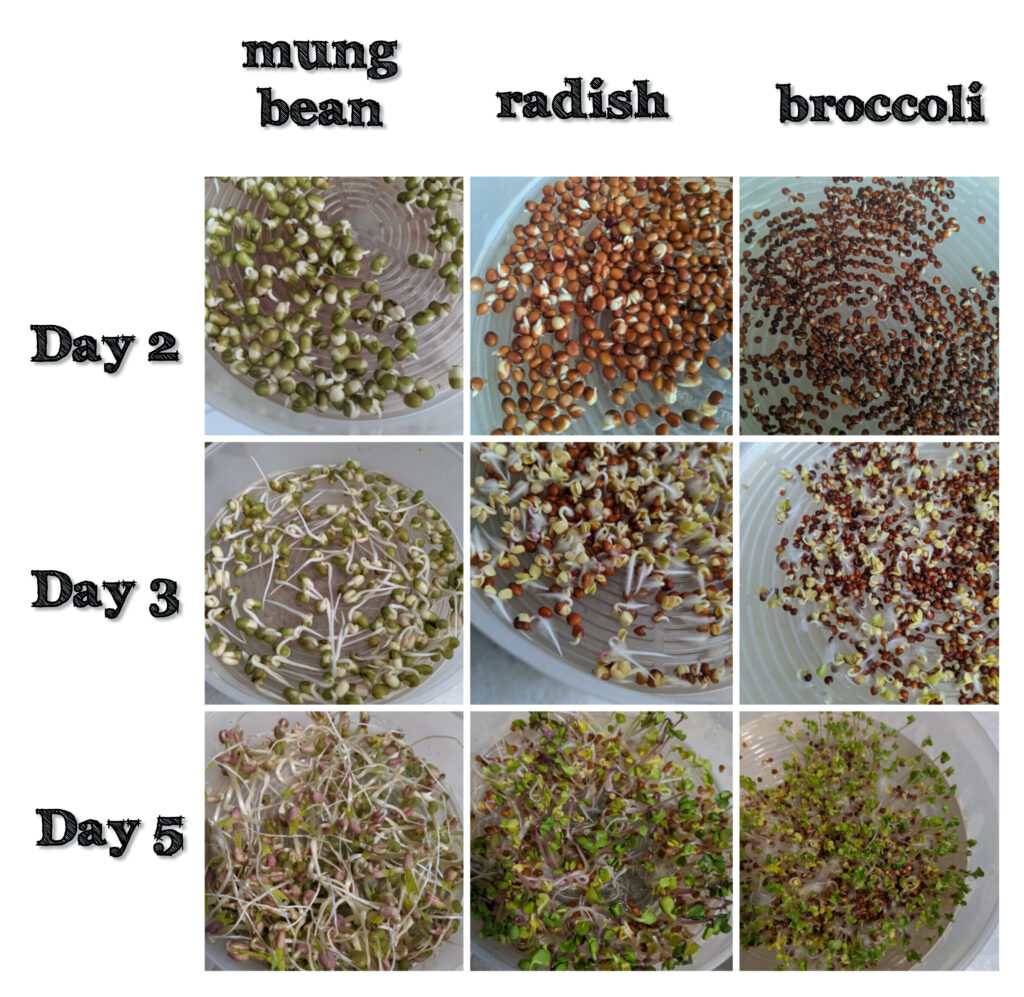
Pictured here are some of the seeds I enjoy sprouting the most. I find that smaller seeds such as broccoli, alfalfa or radish need to be soaked only 2 – 4 hours to activate while larger seeds and beans need 8 – 12 hours.
It’s a good idea to rinse off your seeds thoroughly of any dust and other particles. Also ensure that you check for any small rocks that may look like seeds. Once the seeds have been rinsed, you are ready to soak them in water.
Place your seeds in any container with plenty of room for 2-3 times as much water as the seeds. Different seeds will require different amounts of water but just ensure you add about this amount. The seeds absorb a substantial amount of the water while soaking; the important thing is that you provide them with enough. Too much won’t hurt them; they will only absorb as much as they have the capacity for.
Though you can’t cause problems by using too much water, soaking the seeds too long may cause failure. Seed soaking time often varies anywhere from 2 -12 hours. Most sprouting seeds will come with instructions for how long to soak them. You can also find this information in books or online.
It is a good idea to stir the seeds up while soaking so that they don’t stick together and have trouble with absorbing (if you rinsed them, you should avoid this problem). After you have completed the soak, simply skim off anything that is floating on top of the water (these can include non-seed material or seeds that were not successful).
Rinsing Sprouts
If a seed is given sufficient moisture, it will germinate.
This rinsing process is different from the soaking process because now you are just adding moisture to the sprouts as needed. Draining then allows you to regulate the amount if moisture your sprouts have available.
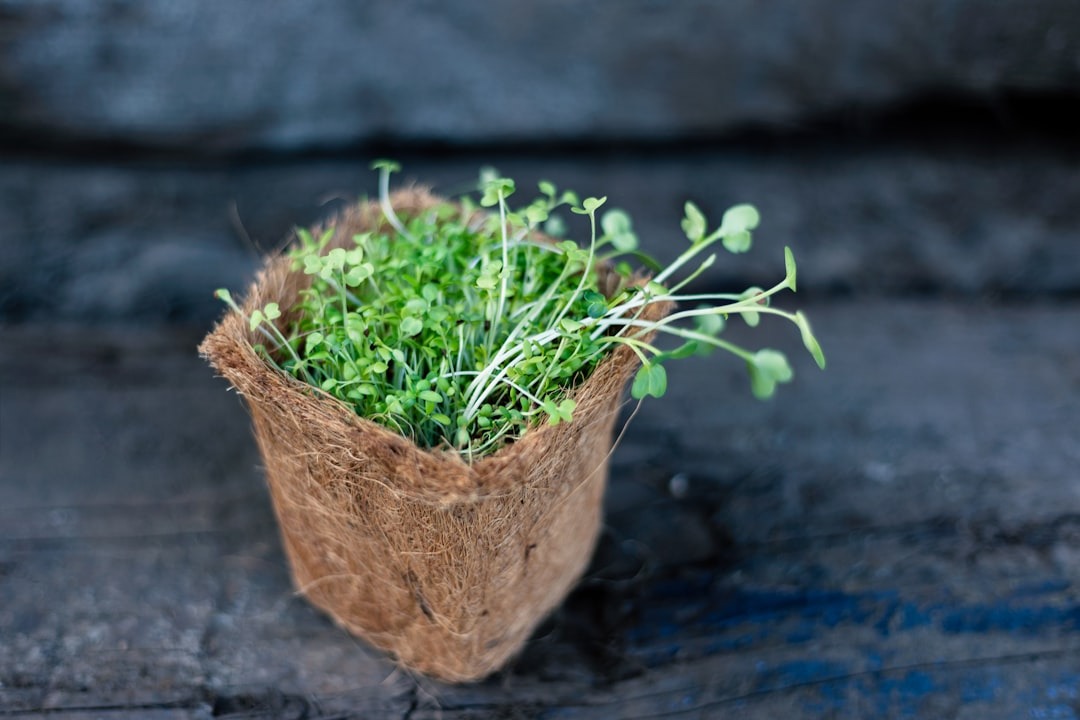
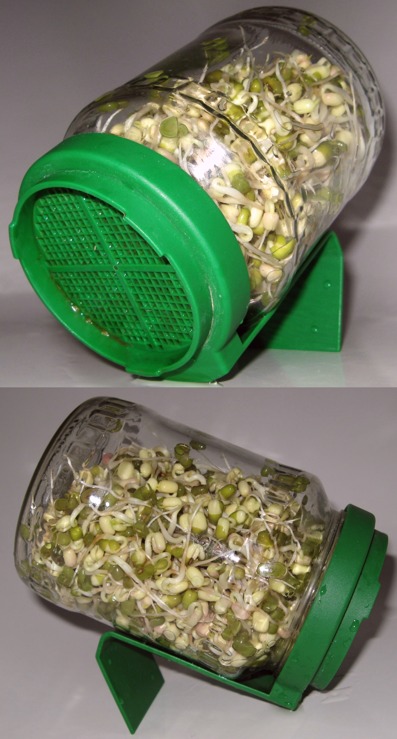
For this step you will need a specialized sprouting container that allows you to drain off the liquid enough to avoid any pooling. There are many intricate sprouting designs, some with stacking compartments, but your container does not need to be fancy by any means. A simple mason jar with a clean metal screen secured by string or elastic will produce the same quality sprouts. Place the newly soaked seeds into your sprouting container.
Pour cool water (60-70°F) over the seeds to cover them completely and use high water pressure whenever possible. Using high pressure water (such as from your sink faucet), will allow you to infuse your sprouts with oxygen and keep them loose. This makes the draining process more effective as well. Perform this rinse 1-3 times daily.
When draining, ensure that you get as much of the water out of your container as possible so that it isn’t pooling in your seeds. When trapped in pools of water, your seeds or sprouts will not grow properly and can become brown and slimy; they thrive when simply kept in a moist environment.
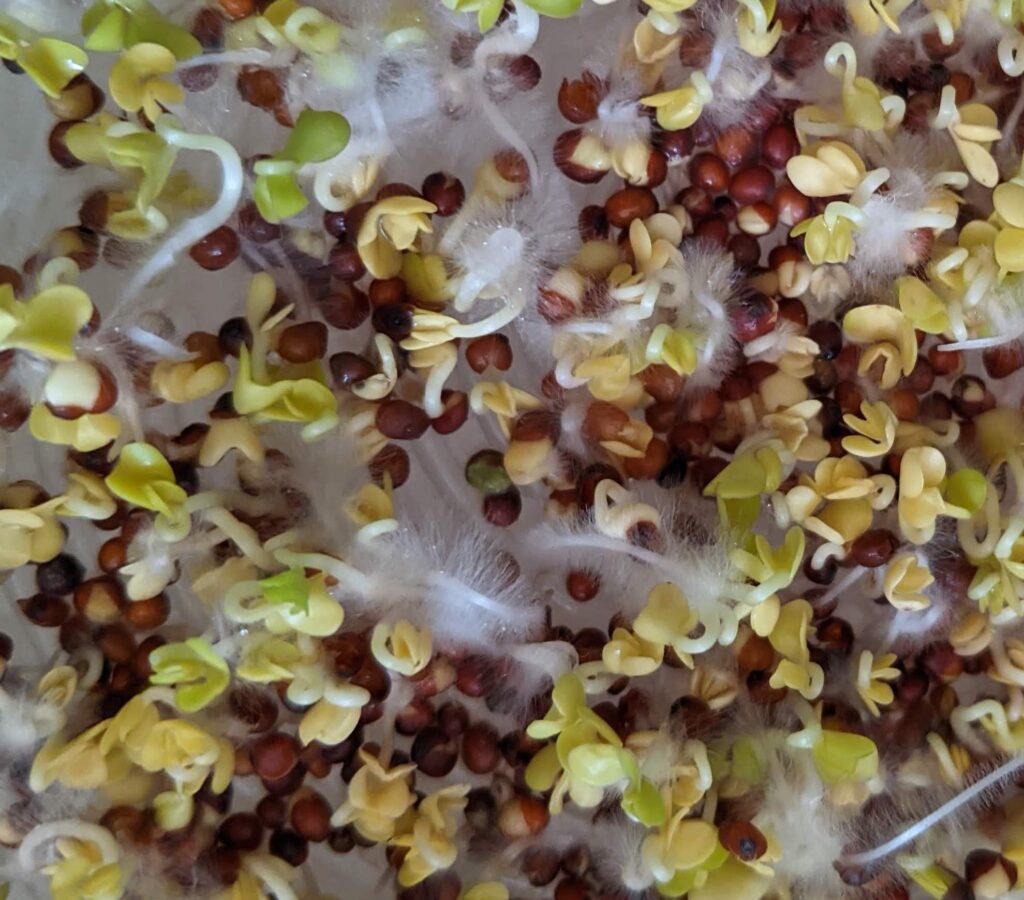
While sprouting you may notice this white fuzz growing that looks suspiciously like mold. Not to worry; it’s simply the tiny root hairs beginning to develop. As long as you’re allowing the sprouts to drain fully immediately after rinsing you won’t be supporting mold growth, which would be indicated by more of a grey fuzz with an earthy odour.
Here I have some photos from the day after soaking the seeds (day 2), day 3 to show how quickly these sprouts really grow, and day 5 when I considered them ready to consume!
Watering Microgreens
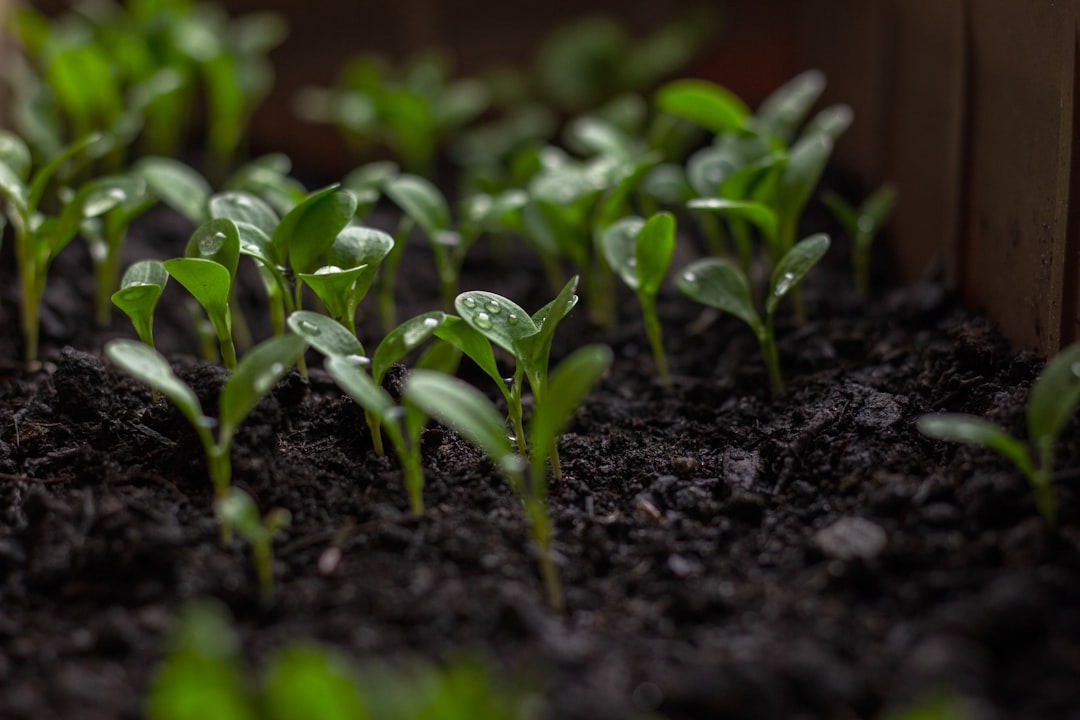
If you are going to be growing micro-greens, greens or grass and you are going to plant them in soil, there are some watering basics to keep in mind.
The basic rule is to keep the seed moist until its root is buried in the soil, at which point your concern will be keeping the soil moist. Just be sure not to over water. The soil should be able to drain and you just need to check that it is always damp so that your greens will be happy!
Your plants will require more water as they grow in size, so adjust how much you give them as they progress (every day or two as they first implant, and then at least every day during their last few days of growth). Make sure you water from the sides to avoid damaging the tender plants.
Additional Pointers for Success
*Ensure there is proper air circulation:
Sprouting containers help ensure that there is enough air circulation for the seeds. It is pretty simple; just ensure that the seeds are receiving air from outside your container, but do not allow them to become dried out from all the air circulation in between rinsings.
*Greening:
It is not too critical to have the seeds receiving direct sunlight at this point as they are not performing photosynthesis until they grow leaves. Your sprouts will be ready to take in light once their cotyledons (first leaves) have shed their hulls (or are just about to).
Allow your sprouts light at this point, if they have not been in direct light already. Once they’ve reached this stage your sprouts will take a few days to complete their growth to the point that you eat them.
If you are growing grass or greens, bring them into the light when they have reached about 1 inch in height (for grass) or 1-2 inches (for other greens). They will be yellow, but will soon become green once they have been sitting in the sunlight for a few days.
Now that you know how to sprout your own seeds, how do you use them?
- Eat sprouts to load your diet with phytonutrients in high concentration.
- Sprouts are a great addition to sandwiches, salads, smoothies, stir fries, breads and many other dishes. Stay tuned to our blog for ideas!
All content contained herein is intended for general information purposes and is not to be considered professional medical advice. Contact a reputable healthcare practitioner if you are in need of medical attention.